You feverishly tap CTRL + z (or Command + z for you Mac aficionados) and come to find that your favorite “no frills” text editor has lost your undo history or you aren’t quite sure where you want to go back to.
Good for more than just development
Git is a piece of software that allows the user to control the versions of files in a directory. It allows the user to ‘commit’ a snapshot of any directory to a ‘repository’ that tracks all of the changes between versions of the files. Git is awesome for development. But, what I have found is that it is awesome for writing as well. Git allows me to commit my writing every so often so I can get back to where I want to be. It also allows me to ‘branch’ my writing so I can separate it from everything else. Let’s take a look at how you can use git to control your writing versions.
Installation, Initialization, and committing
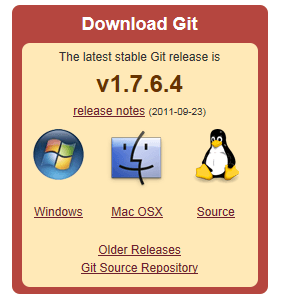
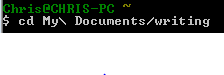
I will be covering Windows and Mac here. For you Linux geeks; you should already know how to use git! To install git do the following: For Windows: Go to git-scm.com, click on the Windows link to the right and download the latest version. Install via the executable and choose the most standard settings. When you get to the Adjusting your PATH environment screen, select the first option, Use Git Bash only and hit next. When at the Configuring the line ending conversions, select the third option, Checkout as-is, commit as-is and hit next. After the install completes click “Finish”. For Mac: Go to git-scm.com, click on the Mac OS X link to the right and then click the latest .DMG file in the list to download. Launch the DMG from your Downloads directory and double-click the git PKG. Follow the on-screen instructions and enter your user credentials. Close the installer when it is complete. OK, now that you have git installed we are going to get geeky and use a terminal in both Windows and Mac. To get to the git terminal in Windows go to the Start button and search for ‘git’. Click on ‘Git Bash’ to get to your git command line interface. For Mac just open a terminal by going to Applications > Utilities > Terminal. Here is where the fun begins. Let’s say you have a folder where you store a bunch of writing. For me that is in my Dropbox/writing folder. If I want to start tracking that directory I can change to that directory via command line then initialize a git repository. This will be close to the same on both platforms. To change to a certain directory use the command: cd [path-to-your-writing-directory] Of course fill in your own directory. My command looks like this in Windows:
The backslash after ‘My’ is used to tell the terminal that the space after the word ‘My’ is there. You can autocomplete your paths by starting to type a directory and then hitting the ‘Tab’ key. And this on my Mac: Once you are at the directory you have all of your writing in you can issue the command git init which initializes a blank “repository” for your directory. This puts a .git directory that is initialized. Once your repository is initialized you can add the files to the repository by typing git add . or git add [some-name-of-a-file] to add only one file. After that you can commit your files to the repository by typing git commit -m “This is my first commit (or some other message)” ‘-m’ is used to tell git that you want to put a message with your commit. Now you have made your first commit to your new git repository! Congrats, you geek.
More on committing and branching
OK, I know that was a little technical, but you are over the hump now. If you want to learn more about git though in your free time, check out Pro Git. It’s free and it is the best tutorial on the inner workings of git. So, what committing does is take a “snapshot” of the directory structure or whatever files you told your git repository to watch. If you make a change to a sentence in one of the files that your repository is watching after you just committed and type ‘git status’ you will be presented with the changes that have been made to the watched files. This lets you know that you have “uncommitted” changes to your watched files. You can then easily commit them by issuing the git commit command. Another neat feature of git is branching. Branching is the idea of making a totally separate branch of your repository. You can create a new branch by typing: git checkout -b this-is-a-new-branch You can then make changes to your tracked files totally separate from your “master” branch. This allows you to take different paths with your writing without screwing up something else that was committed. To switch back to your “master” branch, type: git checkout master Also, remember to commit any changes before creating and changing to new branches. If you don’t you may run into issues down the line where some changes get dropped.
More to come
Let us know if you think that this is helpful or want to learn more about using git to track files leave some messages in the comments. Git is a super application; one that I use everyday. I can’t praise it enough. But, remember, it doesn’t have to be just used by geeks and hackers, writers can use it to keep track of their work and to feel free to explore other writing avenues without losing valuable work they have already created.